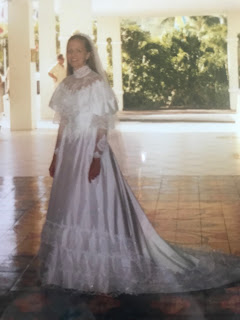
See that girl ^^up there^^? When she was still in the womb, I refinished this dresser for her nursery. She is 20. So I decided it is time for a makeover. She is getting married in a couple of weeks, and has already re-furbished two dressers for herself, so this one is going to be mine now.
I had purchased it at a garage sale probably, for around $20. All the paints were "oops" paints I had collected over time from Home Depot. The knobs were on clearance at Target, and the decals came from a wallpaper border that was on clearance ( I think it was one of those 4' wallpaper borders that might not exist anymore). I used Mod Podge to attach the decals, and probably sealed the whole dresser with it because the paints may have had different sheens- I can't really remember.
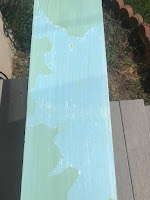
To remove the decals, I heated them up with an iron under parchment paper. That helped a little bit, but where the bottom part of the paper stayed attached in some areas, I used water to wet it and then scraped with a plastic scraper. I took this picture to show people what Mod Podge does over time. Most people know it "yellows," and now you can see to what extent.
To remove the paint, I first sanded. Then after my sister said, "Why don't you just use paint remover?" and the sanding got to be very tedious, I decided to try the paint remover we already had. Neither technique was fun and both required a certain amount of elbow grease and patience. There was a layer of paint as well as primer underneath what I painted, and now I see the benefit of removing the paint before adding on!
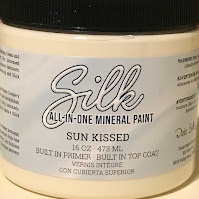
I didn't get a picture of the dresser all sanded and ready to paint. I think I was too exhausted, and excited to get a coat of paint on it! I chose Dixie Belle Silk All-In-One Mineral Paint in the color Sun Kissed which I purchased locally from Generations in Wichita, KS. I had never used Dixie Belle before, but I chose the color because I already had knobs that I had gotten on clearance at Hobby Lobby.
I was worried that I would need more paint because it went on so thick, but because it went on so thick, I only needed two full coats and then some spot checking on areas I didn't paint heavy enough. It only took HALF the container to paint the whole thing!
It's painted, but the best part is coming...I'm going to use fabric to decoupage this part!
I taped off the part around where I decoupaged to keep that area clean and to be able to remove the fabric that got stuck to it rather than trying to scrape it off my new paint. I did a quick search on which medium I should use for this product, and thanks to Deidre at Our Upcycled Life, I think I chose the right medium. I used "Semi-Gloss" because it's what I already had, but want to mention that the dresser is matte and the fabric with semi-gloss polycrylic had a similar sheen to the matte paint.
The fabric I chose is a Pioneer Woman print. I only used a small portion of the pre-cut fabric, so I can use the rest to make or decoupage other things in the future. I matched this fabric to the knobs, but I couldn't believe how well the dresser matched. I was really looking for an off-white paint, but actually ended up liking the pale yellow color it turned out to be.
While the polycrylic dried, I started removing the tags from the knobs. And I also needed to change out the contact paper. Here is the old and new. I forgot to clean out one of the drawers before adding the contact paper and it didn't stick. So I had a little waste, but I'm glad I only paid $1.99 for the roll at Goodwill!
Are you ready to see the final product?! BUT WAIT! There's more... I had to make some repairs on the drawers while I was working on the dresser, and I figured out why. So I added these quarter-round PVC pieces from Home Depot to give the drawers a little more support and to make it easier for the drawers to slide. I attached these with caulk. I had seen a video previously where people used it on trim on their house, and I had to use it in some places in my bathroom and saw how well they held, so I figured, why not? This actually worked great, and the drawers slid much easier.
But I also used some of this on the middle brace where it was still wood on wood.
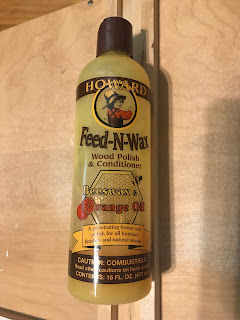
If you can't find it locally, you can find it at Amazon!
And now.... the finished product! What do you think?
I forgot about the wheels! The original wheels were long gone. The dresser had been moved to 5 different houses in 20 years, and across the country. It happens! But I like these better.
If you think THIS is a transformation, I can't wait to show you how this dress from my wedding 24 years ago shows up at my daughter's wedding!


